As I reflect on my participation in the Manaiakalani Innovative Teachers project (MIT) project throughout the year, I realize the growth I went through. Through the design thinking process, I developed a formalized question about the problem I experienced and grew brave enough to put my project out there in the wider community to receive feedback in order to make it better. Here is a summary of what the process looked like.
When our leadership team looked at our data we realized that the data was particularly low in classes where Beginner Teachers and Overseas Trained Teachers taught. I came up with the question, what could I do to help these teachers, so that they don't waste time trying to figure out what to do, as in the time wasted, our students are either taught at the wrong level or taught the wrong topic, or not taught at all, which puts them at a disadvantage. Through the design thinking process and the help of my MIT colleagues, we refined the question to this: How might we support teachers starting at a new school where there is a complex array of new learning needed to be effective in the classroom. Then the question arose, what tool could I create that will actually be of use to these teachers.
I came up with the idea of a site where new teachers could find the most important information in order to speed up their adjustment to school life. After receiving feedback on my survey that I shared on the Teacher's FB page, I determined that the 3 most important areas of concern are assessments, planning, and resources.
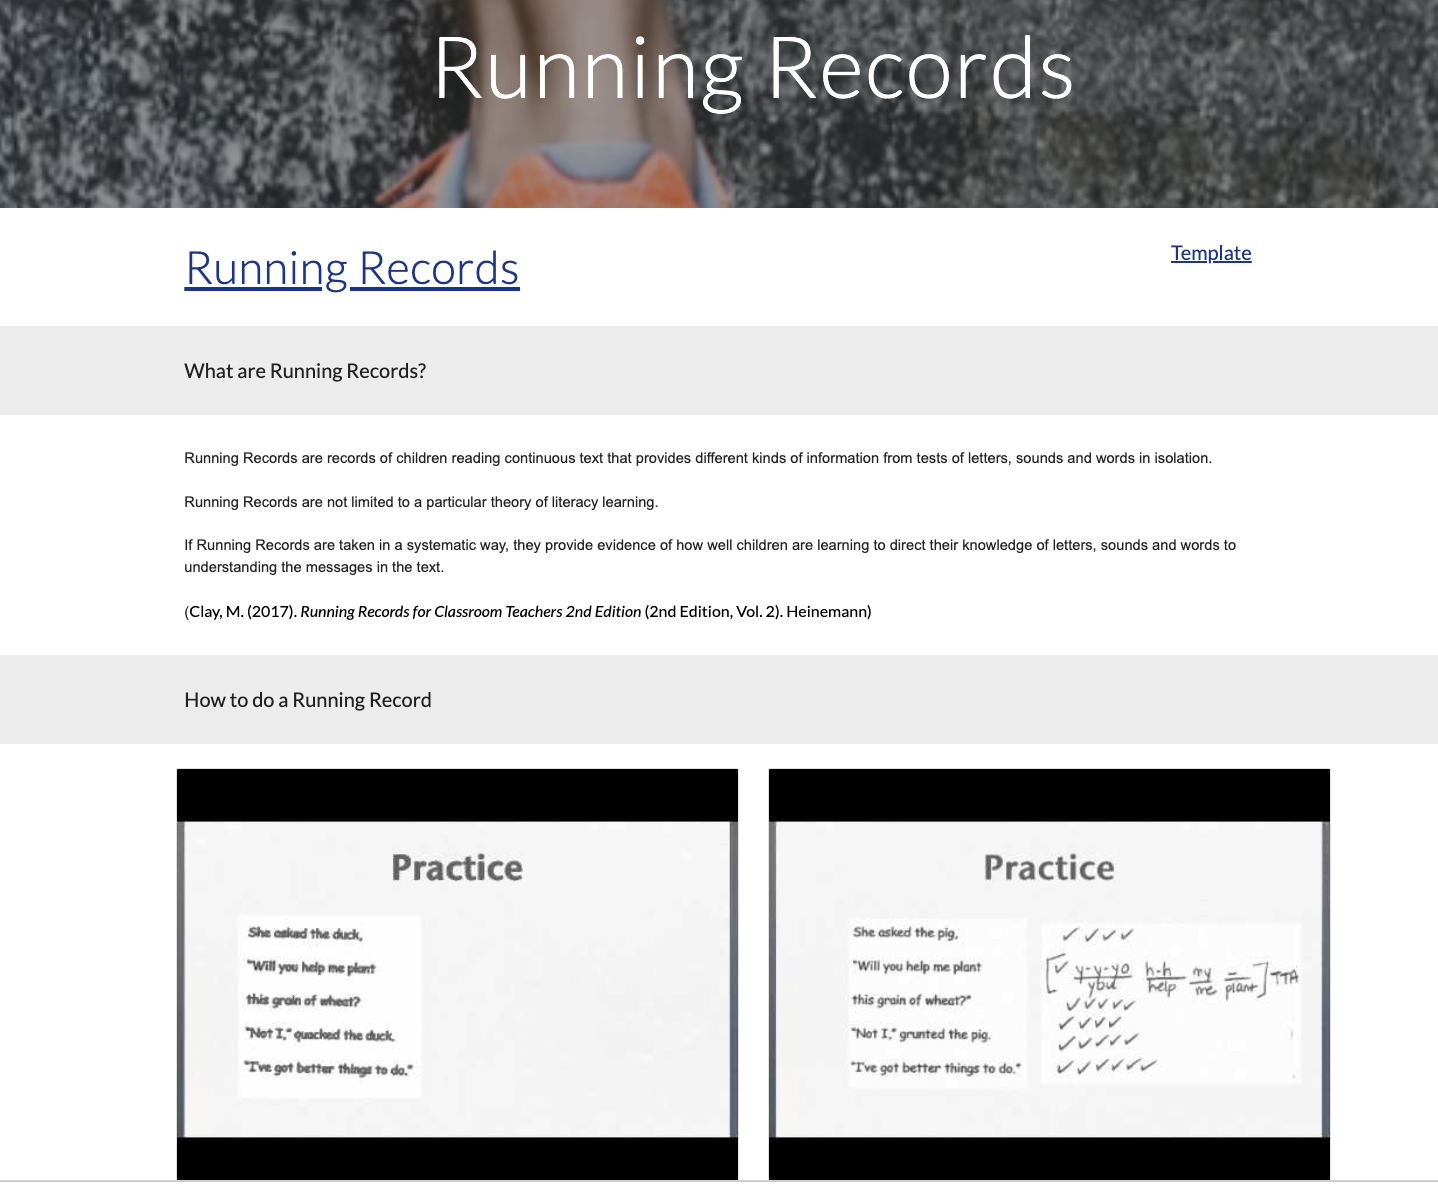
My prototype was very boring, had no images, had too many contrasting coloured bars, and had some very old youtube videos. In order to make my site better, I shared it with as many people as possible and took on the feedback and advice. I tried to bring in an element of fun by changing the name to Survival Kete for New Teachers, With the change of name, I could bring in some elements of a kete, therefore the drop-down menu on the images of the kete's. I even asked for feedback from a Reading Recovery Facilitator. She reviewed my Youtube demo videos on Running Records and gave me feedback on how I could do that better. All in all, I was able to refine my prototype to what it is now, due to lots and lots of feedback from people. I had to be brave to take the feedback on board, and willing to rethink and refine my project. So how can new teachers use my site?
When teachers open the site, they can make a copy of the tracking sheet to keep track of the new learning they have completed.
They can then choose from either the kete drop-down menu or click on the images to take them where they want to be, either assessments, planning, or resources.
Then it's pretty straightforward, they choose what they want to learn about. And read up, or watch videos.
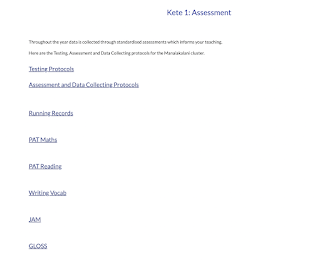
The site contains the following information: Information on Running Records, PAT Maths, PAT Reading, Writing Vocab, Jam, Gloss, Online assessment and data, the process of planning, online resources, and abbreviations and acronyms.
The final stage of the program was to present our projects at the Principal Wananage. Luckily we had a practice run a few weeks before in Rarotonga at the Teachers Summit. The feedback was phenomenal. One team leader came to me and said she immediately shared my site with her Beginner Teachers. I had a principal book me for PD at her school to share my tool with her Beginner Teachers. I wish I had known about the Google Analytics tool so that I could see how many people did look at my site.
I am looking forward to sharing it with new teachers in our school, and to getting feedback from them.
Here is my presentation.
Me in action.
Was it worth being part of the MIT program? Yes, 100%. I learned so much about myself and my thinking processes. I made new connections and experienced being part of something bigger than school. And best of all, I created something that can be useful to somebody and hopefully ease the feeling of being overwhelmed at the start of their teaching career.
A massive thank you to Dorothy Burt and Matt Goodwin, for taking us through the process step by step. And thank you to KMPG for supporting us throughout the year.
As well as my senior leadership team, colleagues, friends, and family. Thanks to your support, my project got refined into what it is now.
If you are considering if you should apply for MIT, my advice would be to have an authentic problem, that you genuinely want to have a solution to, and not to try and come up with a solution before you designed your HMW question, and then...enjoy the journey.